Wednesday, December 28, 2011

Should All Acquaintance Be Forgot? Not If They Make Something this Good.


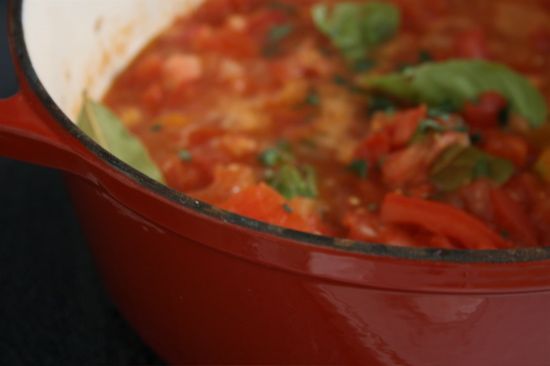
If you haven’t taken care already in deciding how and where to dine on New Year’s Eve, I’ve got a menu plan featuring the 2 D’s: DECADENT & DELECTABLE. Lately, I’ve had my fill of low cal fare, and as we roll into the New Year the last thing I’m interested in is depriving you of butter and heavy cream…and so you’ll notice there’s no shortage of that in this cozy-best-by-the-fireside dinner. The good news is, it’s all very simple, and when you shop the night before for your ingredients your cart won’t runneth over…however, the one you cook for’s heart just might!

This simple New Year’s Eve menu is a love story on a plate. I pulled nearly all of it from the Intimate Valentine’s Day supper chapter in At Home Entertaining. If it’s just the two of you, you could splurge with two Nut-Crusted Rack of Lamb, and lick your fingers afterward. The Creamed Spinach comes from a Tree Trimming Party Plan I like to use. Now that Christmas is over you could use this side-dish’s considerable heartiness to retire the tree. Soft Center Chocolate Cakes are a good thing in a small package; serve them in ramekins great for sipping after-dinner coffee later on. The cake is a beautiful post commentary on Christmas with its sprig of fresh mint, sprinkling of cocoa powder and snow white ice cream on top.

Your Butcher has the Lay of the Lamb

When you buy your lamb, consider this the perfect opportunity to strike up a conversation with the butcher. He can offer to do the “frenching” for you on your rack of lamb; this is the first thing you do in the lamb recipe and it simply means to cut away the fat and meat in between the bones. If the meat department does this, go ahead and ask if they have any “panties” for the clean bones the frenching exposes —these are the frilly white “hats” that go on just before serving and not only prevent discoloring, but give the whole affair je ne sais quoi synonymous with high-end meats . Side note on the “panties”: I looked around for them online, hoping I could suggest a place to buy them, but turned up nothing. The only thing I found was this article on how to make them yourself.

Toast to 2012 with a Fab.U.Lous White Wine

After your pistachio encrusted lamb and sweet buttery spinach, enjoy a little Prosecco wine. It’s an Italian white that some might know from the world famous Bellini cocktail, where Prosecco is mixed with peach puree. No peach puree is necessary tonight, just the Prosecco, which is native not just to Northern Italy, but Brazil and Australia too. Prosecco is less expensive than champagne and tastes just as refreshing chilled.

And so I close with a virtual toast to my readers. Stay safe and well-nourished, my friends and take a moment to revel in the tastes, music and all-around pleasures of the holiday season. Play Auld Lang Syne, wait for The Ball to drop and try to squeeze in one last romantic dinner during 2011. I want to hear all about it when you do!

Soft Center Chocolate Cakes


Individual cakes may be prepared as much as a day in advance and baked just before serving. Remember to add a couple of minutes to the cooking time when baking chilled batter. A scoop of vanilla ice cream is the perfect accompaniment.

2 ounces semi-sweet chocolate
3 tablespoons unsalted butter
1 large egg
1 egg yolk
½ cup powdered sugar
3 tablespoons all-purpose flour


Preheat oven to 450 degrees
1. Prepare two individual soufflé (8-ounce) ramekins by coating the inside with butter.
2. Stir together the chocolate and butter in a saucepan over medium high heat. Remove from heat and cool.
3. Whisk the egg and egg yolk together in a bowl.
4. Whisk in the sugar, the melted chocolate mixture and flour.
5. Pour the batter into the ramekins about ¾ full.
6. Bake the cakes until the sides are set and the center wiggles when shaken about 8 to 10 minutes.
7. Serve the cakes by running a sharp knife around the center and inverting the ramekins onto a dessert plate. Garnish with a scoop of ice cream, a sprinkling of cocoa powder and a fresh mint sprig.

Serves 2
Preparation Time: 20 minutes plus baking

Creamed Spinach


Fresh spinach is quickly wilted and then finished in a rich and decadent cream sauce.

4 (10-ounce) bags fresh spinach
2 tablespoons olive oil

1 cup butter (2 sticks)
1 cup all-purpose flour
1 medium white onion, diced (about 2/3 cup)
4 cups milk
2 cups heavy cream
1 cup Parmesan cheese
3 bay leaves
¼ teaspoon ground cloves
Salt and freshly ground pepper

½ cup fresh breadcrumbs

Preheat oven to 350 degrees.
1. Heat the olive oil in a skillet over medium high heat.
2. Place half of the fresh spinach into the skillet and cook until just beginning to wilt. Remove to a large baking dish. Continue until all of the spinach has been wilted using additional oil as needed.
3. Melt the butter in a large saucepan over medium high heat.
4. Whisk in the flour and cook until golden and bubbling, about 5 minutes.
5. Stir in the onion. Cook for 5 minutes.
6. Whisk in the milk. Reduce the heat to medium.
7. Stir in the Parmesan cheese, bay leaves and cloves. Continue stirring until the sauce has thickened. Season with salt and pepper.
8. Remove the bay leaves from the sauce. Pour half of the sauce over the spinach. Allow the spinach to wilt in the sauce. Add the remaining spinach and sauce.
9. Sprinkle the breadcrumbs over the casserole.
10. Bake for 20 to 30 minutes or until the casserole is bubbling.

Servings: 12
Preparation Time: 30 minutes plus baking

Nut Crusted Rack of Lamb


Choose a rack of lamb that is generous enough to serve two or think decadently and roast two racks. Since it is just the two of you – it’s okay to lick your fingers!

1 rack of lamb, frenched

¼ cup Dijon mustard
4 ounces pistachio nuts, shelled (about 1 cup)
½ cup breadcrumbs
1 tablespoon fresh parsley leaves, chopped
1 tablespoon olive oil
Salt and freshly ground pepper


Preheat the oven to 425 degrees
1. Brush the lamb with the mustard coating all sides of the meat, but not the bones.
2. Place the nuts in the bowl of a processor and pulse until the nuts are coarsely ground.
3. In a bowl, mix together the ground nuts, breadcrumbs, parsley and olive oil.
4. Dredge the lamb into the nut mixture until well coated.
5. Place the lamb on a rack in a baking pan with the bone side up. Cover the bones with aluminum foil to prevent burning.
6. Roast for 12 to 15 minutes or until a meat thermometer inserted into the thickest par reaches 125 to 130 degrees for medium rare.

Serves 2
Preparation Time: 10 minutes plus roasting

Saturday, December 10, 2011

Give the Gift of Cookies


Cookies are everywhere for Christmas. The smell of cinnamon and clove in the kitchen is as much a part of the holidays as jingling bells. Reminiscing about my favorite cookies made me realize what the best thing about them is: in a cookie we crave tradition; we look forward to the predictability of an old family recipe that comes out of the oven with a buttery, sweet predictability year after year. It’s never boring—just delightful.

This is the way I feel about my grandmother’s Great Big Ginger Cookies, which I commence to make just as soon as my tree is trimmed and the holiday lights go up. From Black Friday to New Year’s Eve, I remember my grandmother turning out batch after batch of these guys. The best thing about them? They only soften with age! You can store the leftovers in an air-tight container in the fridge, but make sure you enjoy at least a few Big Fat Ginger cookies 1 day after baking.

Since they are so optimal at a day old, I bake them in the morning on Christmas Eve, so they’re perfect for Santa at midnight.

Good as they are, Big Fat Ginger cookies aren’t the only game in town. Perusing the Times, I saw more than a few foodie columns recalling their old family favorites—from Russian tea cakes to coconut macaroons. Recently, I wrote about giving away baked goods as gifts on the Nana blog, having realized that a cookie isn’t just a cookie anymore. In this now decade-old millennium, life is more of a rat race than ever, and baking cookies is a gentle and simple gesture that gets everyone to slow down for a second. If I had to choose between giving a card stuffed with money, or baking a fresh batch of cookies for a loved one, I think the later is a choice that shows I care more. Is that crazy?

The Gift of the Magi was Time…

For many, the giving away of money is either tough or impossible; so they give their time instead, and create something—whether it’s a cookie or a sweater—for somebody they love. You can’t put a price on that. Some might shy away from giving the gift of cookies because they’d have to pack them up and ship them out. Here’s a solution: pre measure the dry items from the cookie recipe into a mason jar and decorate it with a ribbon and adhesive name tag that bears the recipe. You can always add a cookie scoop (I’ve linked to a really nice one) that lets your recipient drop cookies in the same predictable portions onto the cookie sheet. Because predictability and deliciousness go hand-in-hand after all—especially when it’s a batch made with love.

Great Big Ginger Cookies


2 ½ cups all-purpose flour
2 teaspoons ground ginger
1 teaspoon baking soda
¾ teaspoon ground cinnamon
½ teaspoon ground cloves
½ teaspoon salt
¾ cup margarine (1 ½ sticks) room temperature
1 cup granulated sugar
1 large egg
¼ cup molasses

¼ cup granulated sugar
1 cup raisins

Preheat oven to 350 degrees.
1. Combine the flour, ginger, baking soda, cinnamon, cloves and salt in a bowl.
2. Use an electric mixer to combine the margarine and 1 cup sugar until fluffy.
3. Add the egg and stir.
4. Add the molasses and stir.
5. Add in the flour mixture in 3 additions.
6. Use a tablespoon to portion out the dough. Roll into 2 inch balls.
7. Roll the balls in granulated sugar.
8. Place onto a cookie sheet lined with a Silpat liner.
9. Bake for 10 to 12 minutes or until the cookies are puffed and beginning to turn light brown on the edges.
10. Place the cookie sheet on a cooking rack. Place 1 to 2 raisins in the center of each cookie.
11. Cool the cookies on the baking sheet for several minutes. Transfer to a rack to cool completely.

Yield 2 dozen cookies
Preparation Time: 20 minutes plus baking

Monday, November 28, 2011

Holidays with a Heart


Get a Cocktail Recipe that Raises Humane Society Awareness, Plus Other “Paying It Forward” Ideas that Start in the Kitchen

Right now, the outside of supermarkets smell like pine needles and you can hear jingling bells as the red and green clad volunteers take up collections for good causes. This holiday season, I’ve got a few humanitarian initiatives of my own, starting with a cocktail that’s designed to raise awareness for humane societies across America. You could say my “pet peeve” is the idea of lost or abandoned dogs and cats in need of veterinary care, which is why I’ve been so active in the Avery Humane Society near my home in North Carolina.

In my quest to help the Avery Humane Society this year, I’ve created a special cocktail I like to call the “PAWSmopolitan”. With it’s refreshing combination of vodka, triple sec, fresh cranberry and lime juices and crushed peppermint as a garnish, this cocktail is perfect at your Christmas party and can be renamed just about anything that fits the charity you’re benefitting this year. You just have to put on your Santa/thinking cap!

Here are a few tips on mixing your next party with raising awareness and making the most of charitable donations.

Tip 1: Serve What they Want and They Will Come—Ask yourself: When you host a party, who usually comes? Knowing your regulars’ preferences will help you decide on a theme and menu that come across on the invitation, enticing the whole crowd into an RSVP of “YES”.

Tip 2: Suggest a Donation Amount—Whether it’s by word of mouth or evite, make sure you give a “suggested donation,” but make it clear that any gift is welcome. Ask the charity or organization you support for donation envelopes or blank credit card forms that can be filled out at your event. A good way to collect the envelopes, checks and forms is by wrapping a box in holiday paper, keeping it at the bar where your cocktails are being served, and marking that box as “Drop Donations Here”.

With efforts like these, organizations like my local humane society can raise enough money for positive community altering goals, like a new Adoption and Humane Education Center; click here for details on that. You’ll notice that Avery lets you donate online in ways that look good in your garden or courtyard: buy their specially marked bricks and pavers to show you care.

Save these links to my best recipes for wrapping up and giving as gifts this X-mas.

Bake & Take Savory Items:

• Grandma can heat up a serving of your Chicken & Broccoli Lasagna and enjoy it from her Lazy-Boy!
• Treat Someone You Love To a Cozy At-Home Dinner of Veggie Enchiladas

For Your Friends and Relatives with a Sweet Tooth…
• Santa’s Helpers could use a little crunch! Give ‘em the best Peanut Brittle!
Butterscotch Blondies are a hit in every X-mas tin!
• Adorable Individual Lemon Tarts make that someone special smile!

Bringing someone a holiday tin of fresh baked cookies or cakes, or a premade hearty meal is a wonderful present for birthdays, major holidays or any occasion where your aim is to help someone in need. Since the Christmas season is a wonderful excuse to check in with our elders, consider taking the meal in this handy, insulating thermo cooler bag I found, and stockpiled by the dozen for my gift-giving this year. The bags say “PAY IT FORWARD” on them; you can click around for this tote (and simular items!) on this fab website called MyThirtyOne.com. The idea is to think of them a little bit like an edible chain letter. You give the stuffed-full-of-goodies bag to a neighbor, and they hold onto it until they feel like paying it forward to the next hungry person in line.

Sharing good food, drinks and memories over the holidays and blending these with charity efforts is the best way I can think of, of putting your money where your mouth is. Eat well and be merry. Happy holidays everyone!

PAWSmopolitan!


1 ounce vodka
½ ounce triple sec
½ ounce fresh lime juice
½ ounce cranberry juice
Crushed peppermint candy on the rim of the glass
Fresh pitted cherry for garnish

Fill a cocktail shaker half full of ice. Pour in the vodka, triple sec, lime and cranberry juices. Shake vigorously and set aside.

In a separate bowl, grind a candy cane down into finely minced crumbs. Turn an empty cocktail glass upside down and coat the rim in the candy cane dust.

Strain the contents of your cocktail shaker into the glass and garnish with a fresh pitted cherry.

Friday, November 11, 2011

Get on the Gravy Boat


Gravy. Some cooks are painstaking in their efforts to ladle the very best over their turkey breast and roasted garlic mashed potatoes while others take shortcuts with “Gravy Master”. At the end of the day, it’s all pretty good, but understanding the importance of veloute, a French mother sauce, and its place in truly wonderful holiday gravy makes all the difference.

When you have the tools, you have the talent. Good gravy starts with a sturdy (and flame resistant!) roasting pan. I like this one from Williams & Sonoma because it comes with the most useful accoutrements I can think of for homemade stuffing, dressings and sauces. Don’t get sticker shock when you click the link. This 5lb.-6 oz. roasting pan can cook a Butterball big enough to feed the entire cast of National Lampoon’s Christmas Vacation. It also comes with a thermometer, and V-shaped non-stick roasting rack that cooks everything faster, more thoroughly, and lets all that fatty, buttery goodness drip to the bottom of the pan for later use in your gravy.

“Veloute” is a French Mother Sauce. It Means Velvety, and it So Belongs in Your Gravy

Once your bird is cooked and you’re within an hour and a half of serving it, it’s time to start the gravy. Here’s where your French mother sauce, veloute comes in; create it, simply by melting 1 tablespoon of butter in a sauce pan with 1 ½ cups all-purpose flour. Slowly pour in 1 ¾ cup chicken broth and, using a wire whisk, gently stir the mixture to get the lumps out.

Whisking It All Together

Next, turn your attention to the pan drippings from the now finished turkey. Carefully pour said drippings into a large Pyrex cup (or something like it) and wait long enough for the fat to separate from the liquid. Once you see the obvious divide, you can remove/save the fat and pour the drippings back into the pan; be sure to scoop the fat back into the roasting pan, and add 1 cup of white wine, salt and pepper—then stir, freeing clinging bits of turkey from the bottom of the pan as you whisk away. Add the veloute you just made, once again stirring with your whisk, and in about 5 minutes the mixture thickens into a beautiful thick gravy!

For My Own Twist on a Truly Savory Gravy…

Now that I’ve covered a classic gravy recipe that any purist can appreciate, it’s time for a truly Savory Gravy from my kitchen; you'll see it in the turkey recipe included here. Hint: I use pan drippings from a bird that’s been stuffed with pieces of orange and apple (try my Herb and Sherry Roasted Turkey recipe) and count on the turkey’s skin, rubbed with a heady blend of a half-dozen herbs and drizzled with Sherry as it slow roasts, to make incredible pan drippings that almost stand on their own as gravy.

But you’re not done yet.

The turkey’s long since removed neck and giblets need to simmer, along with celery, parsley and onions—and added to the pan drippings. Soon everything will come together in a complex blend of fruit, juicy meat and fragrant herbs.

For the Vegetarian, I recommend a Red Wine Mushroom Gravy

This mushroom gravy has been carefully modified for this blog with a vegetable broth, and—because of its white (aka “button”) mushrooms has the earthy, meaty texture of the most savory gravy one can imagine…and I hope you’ll enjoy it with the divinely garlicky mashed potatoes, I included with this post.

Feast well, my friends!

Roasted Garlic Mashed Potatoes


Serves 8; preparation time about 30 minutes

4 large baking potatoes, peeled and cut into pieces (about 6 cups)
4 o 6 cloves garlic, roasted
6 tablespoons butter (about ¾ stick)
½ to 1 cup milk
2 tablespoons snipped garlic chives

Boil the potatoes in water until they are cooked, about 20 minutes.

In an electric mixing bowl, combine the potatoes, roasted garlic, and butter. Mix on medium high speed to blend.

Add enough milk to reach the desired consistency. For thicker potatoes use less milk. For thinner potatoes use more milk.

Mix in the garlic chives and season with salt and freshly ground pepper.

Red Wine Mushroom Gravy


2 pounds button mushrooms, sliced
(about 4 cups)
1 cup red wine
3 cups vegetable broth
¼ cup all-purpose flour, mixed with 1 cup cold water

Sautee the mushrooms in the pan drippings over medium high heat.

Remove with a slotted spoon to a bowl.

Add the red wine to the pan. Simmer until the liquid is reduced by half, about 5 minutes.

Add the vegetable broth and simmer for 5 minutes more. Add the flour mixture to the pan, a small amount at a time. Cook until the sauce thickens to gravy consistency.

Add the mushrooms. Season with salt and pepper.

Herb and Sherry Roasted Turkey


Serves 15 to 20 people with plenty leftover

Preparation time: about 20 minutes plus roasting

1 large fresh turkey, 10 to 12 pounds or more
1 to 2 apples or oranges, cut into quarters
¼ cup butter melted
¼ cup finely chopped fresh rosemary
¼ cup finely chopped fresh thyme
¼ cup finely chopped basil
¼ cup finely chopped oregano
½ cup sherry or dry white wine
Salt and freshly ground pepper

Turkey giblet, liver, heart, and neck parts
1 bunch parsley
½ onion, sliced
1 stalk celery
1 bay leaf
¼ cup all-purpose flour, mixed with ½ to 1 cup cold water

Rinse the inside of the turkey thoroughly. Place pieces of apple and orange in the cavity of the bird.

Brush the skin of the turkey with the melted butter.
In a small bowl combine the herbs. Rub the mixture over the top and under the skin of the turkey.

Place the turkey on a rack in a heavy roasting pan. Drizzle the sherry over the turkey and let it run off into the bottom of the pan. Season with salt and freshly ground pepper.

Cover the turkey loosely with a foil tent to prevent over browning. You may place some water in the bottom of the pan. Roast according to the directions on the package for an unstuffed turkey.

Remove the foil with about one hour left to cook, and baste with the pan juices every 15 minutes. Let the bird stand for 30 minutes before carving.

For the Savory Gravy:

Remove the turkey parts from inside the uncooked turkey and place them in a large stock pot covered with water. Add the parsley, onion, celery stalk, and bay leaf to the pan.

Simmer over low heat for at least an hour adding water if the stock cooks down too quickly.

Add the leftover pan juices to the stockpot after the turkey has been removed.

Strain the mixture through a colander and return the gravy to the pan.

Thicken the gravy with the flour and water mixture. Add a little at a time and whisk briskly to avoid lumps.

Sunday, November 6, 2011

Sweet November Strudel


Who doesn’t love a good strudel? It’s one of those things that’s hard to say without an Austrian accent, where the most historic recipe—one for a milk-cream strudel with a mile-long German name—is exhibited as a handwritten recipe in the Viennese City Library. FYI: it’s stuffed with sweet bread, raisin and cream filling and served right in the pan with hot vanilla sauce. It’s the perfect intro image to get you psyched for Butternut Squash and Pear Strudel.

But first, an Ode to Strudel

I love it because it’s so versatile. You can stuff it with pretty much anything you want. As long as you’ve got a little phyllo dough or puff pastry for wrapping, you can take your strudel to sweet confectionary extremes with sugar-laced fruit, or go savory, with potatoes, turkey, cheeses and smoky meats. While I advocate strudel for using the leftover turkey you’ll soon have, the recipe I’m excited about today is full on sweet, with just a hint of chili powder. And it’s fun because it uses seasonal fruit.

Then a Nod to Perfect Winter Pears…

In the rearview of our fruit buying days, we can all look back and say we started buying good pears in the late summer, when we stocked our fruit bowls with Bartletts; those were soon followed by Bosc and Comice, in season during early fall through winter. But it’s the Anjou pear that made it into my sweet November strudel. The Anjou, A.K.A. “the winter pear.” has a crisp green skin, is very, very juicy, and doesn’t change color once it’s ripe.

I can’t tell you how good these pears smelled fresh out of the often, commingling with the bright orange squash and cinnamon and rosemary…it was actually kind of hard to complete the recipe at that point, prepare the phyllo dough and spoon in this heavenly mixture—made even better with the goat cheese I decided to use at the last minute instead of the Gouda. I could have substituted any number of things in this strudel and had it turn out fabulous: instead of pears, I could have used apples; raisins would have been a nice touch too.

And a Crash Course in Phyllo

And as for the phyllo dough, some home cooks may not be all that familiar with it, so I’m going to talk about it a little bit here. Many of my readers have enjoyed Spanikopita in a Greek restaurant, or baklava; these are Mediterranean and Middle Eastern favorites that call for phyllo (phyllo is the Greek word for “leaf” and when you see how sheath-like phyllo is, you’ll understand its name better).
Phyllo may be paper thin, but it’s not so brittle that you have to worry about it falling to pieces when you work with it. Just relax and roll it out in a sheet; no worries! You’ll find it in the frozen food aisle, with the pie shells. Keep your eye out for a rectangular box (looks just like a roll of aluminum foil, actually) marked “Phyllo.”

You could use puff pastry for this recipe too. The only difference between Puff pastry and phyllo is that you fold the dough when you’re working Puff and stack it for phyllo—once you’ve stacked the phyllo—as I suggest in this recipe with breadcrumbs separating each of the 5 phyllo layers that compose 1 log—you can then roll it to your heart’s content. Remember that with Phyllo, it’s very important to brush each layer with generous amounts of butter, or it won’t brown up in the oven the way you want it to.

Once you get comfortable with Phyllo, you’ll be making strudel every other weekend to go with your coffee. Make sure you make my other Phyllo Fav: Just like Grammy’s Apple Strudel. Happy Strudeling, everybody!

Butternut Squash and Pear Strudel


Yield: 8 to 10 pieces per strudel
Prep Time: 30 minutes
Cook Time: 12 to 15 minutes

1 medium butternut squash, peeled and diced into ¼-inch squares (about 4 cups)
2 large pears, peeled, cored and diced into ¼-inch squares, about 2 cups
1 tablespoon olive oil
1 teaspoon chili powder
½ teaspoon ground cinnamon
Salt and freshly ground pepper
2 to 4 fresh rosemary sprigs
4 ounces Gouda cheese, shredded, about ½ cup
12 tablespoons (1 1/2 sticks) unsalted butter
1 package frozen phyllo dough (such as Pepperidge Farm) thawed
1/4 cup plain dry breadcrumbs

Preheat the oven to 400 degrees F.

Place the diced butternut squash and pear onto a baking sheet. Drizzle with olive oil and sprinkle with chili powder, cinnamon, salt and pepper. Place the sprigs of rosemary into the mixture. Roast until the vegetables are browned and soft, about 20 minutes. Cool mixture to room temperature. Remove rosemary sprigs. Gently stir in the cheese.

Melt the butter in a small pan and set aside.

Unfold 1 sheet of the phyllo dough. Brush the sheet with melted butter and sprinkle with bread crumbs. Repeat the process by laying a second sheet of phyllo dough over the first sheet, brush it with melted butter and sprinkle with bread crumbs until 5 sheets have been used.

Spoon a 1-inch wide row of the butternut squash mixture along 1 edge of the phyllo dough. Roll it up. Brush the top with butter and set aside. Repeat the entire process using the remaining phyllo dough and butternut squash filling. You will have 3 logs.

Cover a baking sheet with parchment paper. Score the strudel diagonally into 1 1/2-inch pieces and bake for 12 minutes, or until the top is lightly brown. Slice and serve.

Note:
You can substitute with any cheese, goat or brie cheese are good alternatives. You can also substitute apples for pears. You can prepare the strudel in advance and freeze. To bake, remove them from the freezer, place onto a baking sheet lined with parchment paper until golden, 12 to 15 minutes.

Saturday, October 29, 2011

Dinner in “Umba” Land


It’s Latin Aerobics that starts with a “Z”, and ends with an “Umba”—a trademark that has generated exercise classes everywhere, with health club owners tiptoeing around copyright law unless they’re official paying members of the *Umba movement. Just plugging my zipcode into their ditch-the-workout-join-the party finder yielded 846 results in my town alone. Before I knew it, I was thumbing through the recipes in my tighter tummies and butts chapter from GORGEOUS, and getting in the mood for a little salsa in my food, with strains of meringue and flamenco as dinner music.

Umba-Land—we’ll just call it that for now—was inspired by a Columbian dancer the day he forgot his music on the way to the studio, and decided to improvise with the stack of cassette tapes in his car. Soon he had his students sashaying and shimmying to choreography that mimicked everything from hip hop to the martial arts. Watching Umba-Land’s creator talk about the dance movement is something to see. He’s said that the people who do it have thanked him, crediting the exercise with beating cancer, achieving and maintaining a healthy weight and helping with income when some begin teaching Umba themselves.

I’ve also read that if and when you join the Umba movement, you should ensure that class size is under control (no more than 18) and that an experienced instructor who’s familiar with Umba moves is there to supervise. It seems that physical therapists have rushed to the aid of some who pulled a muscle or tore this or that, rocking a Bollywood beat, or some other component of this fun dance. I was excited to pull recipes from GORGEOUS that are low in fat and high in complex carbohydrates that give Umba enthusiasts that extra kick in an hour long session—which, you’ll be happy to know, burns somewhere between 500 and 1,000 calories! What a nice way to go into the holidays, when you know those Thanksgiving and Christmas pounds are on rush delivery to your hips.

A Spicy Breakfast, Lunch & Dinner Menu that Says Hello Heat, Goodbye Fat!

I found a site, compliments of PBS that delivers caliente musica, perfect for dancing around the kitchen and preparing high energy dishes for a whole day when cardiovascular exercise is on the menu. For breakfast, get out some chopped fresh cilantro, red bell pepper and your favorite hot sauce to whip up Easy Mexicali Breakfast Tacos. They pack an antioxidant rich punch and have just 130 calories each! Think about it—that’s less than your average container of yogurt.
For lunch, try the Spicy Tuna Dinner Salad with Balsamic Dressing; with the addition of lean tuna—a good omega-3 rich fat, and white beans, excellent protein, fiber and carbs—holy frijoles, you’ve got yourself a healthy meal, made savory and spicy with all that lime infused chili sauce and yummy garlic. Five-Spice Beef Wraps With Orange Ginger Dipping Sauce for dinner pleases the meat and potato loving crowd every bit as much as those who feel deprived unless you bring on the heat. I won’t reveal what the spices are now…you’ll just have to click on the recipe link or scroll down to find out. In any event, if you eat everything proposed here for Umba Day, you will have enjoyed every last morsel of what doesn’t even add up to 1200calories—for the whole day! Now you can go ahead and eat like you have a wooden leg over the holidays—in which case I hope you’ll check my blog for decadent fare!

Easy Mexicali Breakfast Tacos


Makes 2 servings
Prep Time: 5 minutes
Cook Time: 5 minutes

2 green onions, thinly sliced (about 2 tablespoons)
½ large red bell pepper, seeded and diced (about ½ cup)
1 large egg
3 large egg whites
Salt and freshly ground pepper
2 (6-inch) corn tortillas
1 tablespoon reduced fat sour cream
1 tablespoon chopped fresh cilantro

Heat a skillet, coated with vegetable oil spray over medium heat. Add the green onions and red pepper and cook until soft, about 2 minutes. Whisk together the egg and egg whites. Pour this mixture into the skillet and cook until set, about 3 minutes more. Season with salt and pepper,

To serve, heat the tortillas in a microwave oven until soft. Divide the egg mixture among the tortillas. Fold in half, taco style. Garnish with sour cream and cilantro.

Five-Spice Beef Wraps with Orange Ginger Dipping Sauce


Makes 4 servings
Prep Time: 20 minutes
Cook Time: 20 minutes

For the dipping sauce
¼ cup rice wine vinegar
Juice of 1 medium orange (about 1/3 cup)
2 tablespoons all natural sugar
1 (1-inch piece) ginger, peeled and grated (about 1 tablespoon)
1 tablespoon prepared chili sauce
Salt and freshly ground pepper

For the beef
1 (1 pound) flank steak, cut across the grain into thin slices
1 teaspoon Chinese five-spice powder
1 teaspoon toasted sesame oil
1/3 cup dry sherry
2 large shallots, minced (about 2 tablespoons)
Zest of ½ medium orange (about 1 tablespoon)
1 tablespoon prepared chili sauce
1 (4-ounce) can whole water chestnuts, drained and cut into 24 slices
1 bunch (6 to 8) green onions, thinly sliced on the diagonal (about ½ cup)

For the wraps
8 large Boston lettuce leaves
½ cup chopped peanuts
1 large carrot, shredded (about ½ cup)


Pour the rice wine vinegar, orange juice, sugar, ginger and 1 tablespoon chili sauce into a pan over medium heat. Stir and simmer until reduce and thickened slightly, about 5 minutes. Remove from the heat.

Toss the flank steak with Chinese five-spice powder and sesame oil. Heat 1 tablespoon olive oil in a skillet over medium high heat. Cook until the meat is golden on the edges, but still pink in the center, about 5 minutes. Pour in the sherry, shallots, orange zest and 1 tablespoon chili sauce. Cook, until the sauce thickens slightly, about 3 to 4 minutes more. Stir in the water chestnuts and green onions.

To serve, pour the meat into a serving bowl. Place the lettuce leaves and condiments alongside. Pour the dipping sauce into a bowl. Invite your gang to create their own fabulous wrap.

Spicy Tuna Dinner Salad with Balsamic Dressing


Makes 4 servings
Prep Time: 20 minutes
Cook Time: 10 minutes

For the dressing
4 medium cloves garlic, peeled
Juice of 1 medium lemon (about 2 tablespoons)
1 tablespoon Worcestershire sauce
1 teaspoon Dijon mustard
1/3 cup Balsamic vinegar
2 tablespoons fresh cilantro leaves
¾ cup olive oil
Salt and freshly ground pepper

For the tuna
Juice of 2 medium lemons (about ¼ cup)
2 tablespoons orange marmalade
1 tablespoon Chili powder
1 (1-pound) tuna steak
1 tablespoon olive oil
1 pint ripe cherry tomatoes or mixed baby tomatoes
1 small red onion, peeled and thinly sliced (about 1/2 cup)

For the salad
1 large head romaine lettuce, washed, dried and torn (about 8 cups)
1 (15.5-ounce) small white navy beans, drained

Place the garlic, 2 tablespoons lemon juice, Worcestershire sauce, mustard, Balsamic vinegar and cilantro into a blender. Pulse to emulsify. With the machine running, slowly add ¾ cup olive oil. Season with salt and pepper.

Mix together the lemon juice and marmalade. Brush this mixture over the tuna. Sprinkle with Chili powder. Marinate the tuna for 15 minutes. Cut the tuna into 2-inch chunks. Heat the olive oil in a skillet over medium high heat. Sear the tuna until golden, about 2 to3 minutes. Turn and add the tomatoes and onion. Cook until the tuna is seared on both sides, but still rare in the center, and the tomatoes have begun to turn brown and the onion begins to soften. Remove from the heat.

To serve, arrange the lettuce onto 4 dinner plates. Sprinkle the beans over top. Place the tuna and tomatoes onto the salad. Drizzle the dressing over all.

Thursday, October 6, 2011

The No Pumpkin Left Behind Bakery


I haven’t done any baking yet, but as you can clearly see my items are all laid out, and this year gives cause for both trepidation and eagerness to try something I can’t believe I haven’t tried before: making my own pumpkin puree.

I’ll admit it’s the one item I don’t—or didn’t in previous years anyway—mind phoning in; after all, the ingredient list on the back of the can features just one item, “pumpkin”, so you know it’s as pure as the driven snow that’s just a few weeks shy of blanketing us this season.

But let me tell you what’s driving me. I got the idea to make my own pumpkin puree from a new Slow Food Movement Challenge, called “October Unprocessed.” For anyone who’s game, that means that everything you eat should and can—for not too much money—be made from scratch. I think that’s a great idea, except for a cheat day on October 31st when ripping into a Fun Sized Snickers doesn’t seem like the worst of crimes. I won’t tell if you won’t, and just to put this out there now: I do intend to decorate my purest pumpkin desserts with a little candy corn—which is just for show and comes right off, leaving your icing intact.

So there’s that…and the second driving force to gut, bake and scrape 2 smallish pumpkins until my best friend Mr. Food Processor can render them into a creamy paste, is my excitement over kitchen gadgets, or KMHs. To the uninitiated, that’s a Kitchen Must Have, and I’m writing a new cookbook right now that encourages their avid use. From deep fryers, chicken rotisseries, mandolins and food mills, I am all about the KMH. They can cost a lot, yes, but in no time at all they’ve paid for themselves by giving your family superior food and MORE of it. The particular beauty of making your own puree is that you get to keep the pumpkin seeds and roast ‘em later on!

My Homemade Pumpkin Puree (click the link to find out how to do it; I’ve gleaned together my own recipe by reading over scads of others and perfecting my own technique! I’ll post news ASAP on how effective it is. But I can tell you now that it SOUNDS easy!) calls for two midsized pumpkins, and from what I understand they’re going to yield several Ziplock bags of puree—way more than I need for the baked goods I plan on surprising my loved ones with this month. After I use a fraction of the lovely, sweet smelling autumn colored stuff for Pumpkin Apple Muffins and Pumpkin Brownies with Cream Cheese Frosting, I’ll have enough left over to freeze for other pumpkin treats further down the road. Plus, I’ll have the added pleasure of getting back with my readers on Facebook and Twitter to let them know if there was much of a difference between the pumpkin confections I’ve made with canned puree vs. the real deal that I mashed up myself.

Can you stand the suspense?

My senses are going to go wild with the scent of ground ginger, clove, cinnamon and allspice. I might actually turn into a pumpkin if I served it with TOP NANA’s seasonal hot toddy of “Pumpkin Pie in a Cup.”

Am I out of my gourd? Stay tuned to find out!

My Pumpkin Puree


Ingredients:
1 medium sized pumpkin

Yields: About 18 ounces of puree (equivalent to 2 cans of pumpkin)

Preheat the oven to 350 degrees

Wash the pumpkin and, with a large knife, cut the stem off. Cut the pumpkin in half so that you can see the seeds and strings; scoop them out with a big spoon and set the seeds aside for roasting later.

Cut the seedless pumpkin into 6 to 8 pieces and arrange, skin side up, on a baking sheet covered with aluminum foil.

Bake for 45 minutes and check with a fork to see if the pumpkin is soft. Wait until the pieces cool and then scrape the pumpkin meat away from the skin. Discard the pumpkin skin.

Working in batches, place the pumpkin into the bowl of a food processor and pulse until smooth. You can also mash it with a potato masher, adding up to 3 tablespoons of water if the mixture seems to dry.

Store any excess puree in a ziplocak freezer bag for later use.

Pumpkin Apple Muffins


Servings: About 16 muffins
Preparation time about 10 minutes plus baking

2 ½ cups all-purpose flour
1 teaspoon baking soda
½ teaspoon salt
2 cups sugar
1 cup pureed pumpkin
2 eggs
½ cup canola oil
1 medium apple, peeled and finely diced (about cup)
Confectioners’ sugar

Preheat the oven to 350 degrees.

Prepare a muffin pan by lining with paper cups or coating with vegetable oil spray.
In a medium bowl combine the flour, baking soda and salt. Set aside.

In a large bowl whisk together the sugar, pureed pumpkin, eggs and oil until well blended.

Stir in the dry ingredients.

Stir in the apple pieces.

Pour the batter into the prepared muffin cups, filling about 2/3 full.

Bake for 30 to 35 minutes until a toothpick inserted into the middle comes out clean. Cool on a rack. Sprinkle the muffins with confectioners’ sugar.

Pumpkin Brownies With Cream Cheese Frosting


Makes 12 to 18 brownies
Preparation time: About 15 minutes, plus baking

2 cups all-purpose flour
2 teaspoons baking powder
1 teaspoon ground cinnamon
1 teaspoon ground ginger
¼ teaspoon ground cloves
½ teaspoon salt
¾ cup butter, room temperature
1 ½ cups firmly packed brown sugar
2 eggs
2 teaspoons vanilla extract
1 ½ cups pureed pumpkin (or 15-ounce can of pumpkin)

Cream Cheese Frosting recipe follows
Candy corn for decoration

Preheat the oven to 350 degrees.

Prepare a 13X9 inch baking pan by coating it with vegetable oil spray and dusting it with flour.

In a medium bowl, combine the flour, baking powder, cinnamon, ginger, cloves, and salt. Set aside.

In the bowl of an electric mixture, combine the butter and sugar and cream together until smooth and fluffy. Add the eggs and mix.

Stir in the vanilla extract and pumpkin. Add the dry ingredients and mix thoroughly.
Spread the batter into the pan and bake for 20 to 25 minutes until a toothpick inserted into the middle of the brownies comes out clean.

Cool the brownies and spread the frosting on top. Cut into squares and sprinkle with candy corn to serve.

Cream Cheese Frosting:
1 8-ounce package cream cheese
¾ cup confectioners’ sugar
1 tablespoon cream
¼ teaspoon ground cinnamon

In the bowl of an electric mixer combine the cream cheese, sugar, cream and cinnamon, and mix until fluffy.

Saturday, September 17, 2011

My Slow Food Pledge Worked!


Read what we’re having for dinner…

It’s a fact of the new millennium: if you want to hang on you better speed up. But thanks to concepts like The Slow Food Movement, we are reminded that our basic needs—such as sharing a healthful and delicious meal among friends—never change. Reflection and togetherness make renewal possible, so why not provide the perfect zen backdrop with a dinner party that doesn’t break the bank? It’s why I decided to take the Slow Food Movement $5 Challenge. On September 17, 2011 likeminded people all over the world are attempting to make a healthy meal, using fresh and mostly local ingredients for no more than $5 per guest—roughly what a fast food dinner costs.

Tonight I’m serving Greek Moussaka Casserole for six guests, and am happy to report that the grand total for my ingredients, once divided amongst each diner, is going to be $4.89 give or take a few pennies. This Mediterranean dish was cost effective for me because I reserved some of the meat when I made grilled lamb chops earlier in the week. Simply shred the lamb and add to the skillet with the cooked veggies. Immediately add the wine and tomatoes, continuing with the recipe. Lamb’s not too badly priced at the grocery store—averaging anywhere from $5 to $8 per pound—even in light of the money saving challenge, I knew I could splurge on the red wine that goes in (and with!) this dinner.

I’m really looking forward to sitting down and enjoying this dinner with my friends tonight. I could have approached this challenge in other ways: look for a potluck or host one of my own, make a one serving dinner that cost no more than $5 or find a community event. The extreme party planner in me chose hosting a dinner instead, which I could have done even more frugally with a pasta based dish. But I don’t like being too obvious, and chose Moussaka because A. I love meat and B. Moussaka reminds me of a lasagna that uses eggplant instead of pasta, and lamb instead of beef. My next Slow Food effort might be vegan, having been so intrigued to find a popular book called, Vegan on $4 a day. This I gotta see (read).!

It’s Never Too Late to Cook Slow

Though you might be seeing this post a little late to meet the 9/17/11 challenge in time, take heart. There’s Food Day on October 24th and October, as I understand it is National Organic Harvest Month—so all the menus and table settings should be pleasing to both palate and eye. Besides that, Food Day and Slow Food have much in common. Here are some of the cornerstones in thinking and eating that they share:
• Eat together
• Buy Organic
• Avoid genetically modified food
• Conserve, compost and recycle
• Try making things from scratch
• Learn your region’s food story

These items are critical to the Movement’s initiative of taking back, or rather rejecting “the value meal”. The Slow Food Movement said it best: fresh, seasonal food shouldn’t cost more than fast food. Fruit should be easier to buy than Fruit Loops—and to prove it, we’re going to make something with 10 times the love and care of a drive-thru but at the same $5 price. For more background on this day and its campaign, read frequently asked questions or their website—you can click here for $5 cooking tips and recipes. Know this, too: if moussaka isn’t quite what you had in mind for your next Slow Food dinner, please write to me and I’ll send you something more ideal in two flicks of a lamb’s tail.

Thanks!

Greek Moussaka Casserole


3 large eggplants, peeled and sliced into ½-inch thick lengths
Salt and freshly ground pepper
4 to 6 tablespoons olive oil

1 large yellow onion, diced into ½-inch squares (about 1 cup)
2 large carrots, diced (about 1 cup)
2 medium cloves garlic, minced (about 1 teaspoon)
2 pounds lean ground lamb
1 cup red wine
1 (16-ounce) can diced tomatoes
2 tablespoons tomato paste
1 teaspoon dried oregano
1 cinnamon stick

3 tablespoons butter
3 tablespoons all-purpose flour
2 cups milk
4 ounces finely grated Parmesan cheese (about ½ cup)
½ teaspoon ground nutmeg


Preheat the oven to 350 degrees.
1. Season the eggplants with salt and freshly ground pepper. Place into a colander for 30 minutes to lose excess moisture. Pat the eggplant dry. Heat 2 tablespoons of olive oil in a skillet over medium high heat. Cook the eggplant in batches, turning once until soft and just beginning to brown, about 2 minutes per side. (Do not let the eggplant slices get too mushy.) Drain on paper towels. You may add more olive oil as needed.

2. Heat 2 more tablespoons of olive oil in the skillet. Cook the onion and carrots until soft and golden, about 5 to 7 minutes. Add the garlic and cook for 2 minutes more.

3. Add the lamb to the pan. Cook, breaking up the meat with a spatula until browned, about 8 to 10 minutes.

4. Stir in the wine, tomatoes, tomato paste, oregano and cinnamon stick. Simmer for 15 minutes. Season with salt and pepper. Remove the cinnamon stick.

5. Heat the butter in a saucepot over medium high heat. Whisk in the flour. Cook until golden and bubbling, about 2 to 4 minutes. Pour in the milk. Cook, stirring constantly until the sauce is thickened, about 6 to 8 minutes. Stir in the Parmesan cheese. Season with ground nutmeg, salt and pepper.

6. Assemble the moussaka by placing a layer of eggplant slices in the bottom of a 9 x 13-inch baking dish. Top with half of lamb mixture. Add another layer of eggplant and another layer of lamb. Finish with a layer of eggplant. Top the casserole with béchamel sauce. Bake until the casserole is bubbling and the top is golden, about 30 to 40 minutes. Allow the casserole to sit for 15 minutes before serving.

Servings: 6 to 8
Preparation Time: 30 minutes plus 40 minutes baking

Thursday, September 8, 2011

Spend Small, Live Large!


When it comes to food trends I’ve got my radar on. Like a potato with too many eyes, I often put feelers out (to my recipe testers) to see how they feel about the latest craze, and with the economy holding so many of us hostage, I was eager to see if extreme couponing and really good food could go hand in hand. I turned to a local grocer, who is all about fresh and organic. A few weeks ago, he offered an in depth personalized tour of how to find the best deals in his store.

Everyone at the tour wanted the latest monthly edition of the coupon book he spoke about (I linked to it here), and they wanted to know more about the 365 store brand—one tour member said they recognized our Whole Foods guide from the rotary garden club—small world! It soon became clear just how long I’d been preaching to the choir. Our friends and neighbors really do want to know where our food comes from and turn cooking into a less solitary experience. I felt good about that the rest of the day—even if I didn’t win the $500 bag of groceries at the end of the tour.

My economy shopping hence reminds me that bargain hunting really isn’t about snipping along dotted lines that save you 40 cents here, and 75 cents there; it’s about stretching, about buying the steak, but with a menu in mind that ensures 1 ½ pounds ground sirloin feeds four and incorporates the things in your crisper that only last so long. The eggplant in this dish saves you from having to buy breadcrumbs too, binding the meatballs and helping bake the cheese in oh so beautifully! My Meatballs with Eggplant Topped in Muenster Cheese (shredded zucchini and carrots also work well) is a deeply satisfying casserole that you can eat off of for a couple of days. Another good one for budget eaters is Veggie Burgers with Spicy Cranberry Mayonnaise. You save $5—the cost of 4 frozen patties. My recipe yields twice that amount of better-tasting faux beef.

As to what my contributors think of EXTREME couponing, whereupon you pay virtually nothing for a grocery cart bulging at the seams...I thought I’d share a few of their quotes because they were so down to earth and funny:

Says one foodie friend:
“I think the whole thing takes too much time. I don't have a basement to store a year's worth of paper towels either. I'm not sure how they get all those coupons. I am lucky if I have 2 or 3 to use each week for things I NEED. And it is rare to get a coupon for produce or non processed food. I tried waking up on Sunday and planning my shopping trip based on coupons and sale papers but it is no fun to make 3-4 different trips just to save a dollar here and there. I try to shop just once a week.
P.S. This particular foodie friend has begun taking cooking classes at The Publix Apron Cooking school and reports that learning more about the kitchen is saving her calories, time an money.


Says another foodie friend on the subject of extreme couponing:
“I've been couponing for 30 years and have a good stash, but I don't do extreme. I spend 30-60 minutes a week clipping from the Sunday paper or printing and clipping from the Internet, then sorting into my coupon keeper. And I subscribe to several Facebook coupon groups, like Fabulessly Frugal and Frugal Gals. They link you to free coupons and give tips on what coupons to use where. But I don't do a ton of coupon matching to stock up, I just take my coupon bundle with me and match as I go, depending on what I really need.”

Thank you, guys, for sharing! I love it when you bring something to my table! Happy cooking and good luck on spending small and eating big!

Veggie Burgers with Spicy Cranberry Mayonnaise


2 cups dry lentils
1 tablespoon olive oil
2 (8-ounce) packages portobello mushrooms, chopped into ¼-inch dice (about 3 cups)
1 (16-ounce) red kidney beans, drained and mashed
1 cup whole wheat bread crumbs
½ medium white onion, finely diced (about 1/3 cup)
4 medium cloves garlic, roasted and mashed
1 tablespoon Worcestershire sauce
2 tablespoons fresh thyme leaves, chopped
Salt and freshly ground pepper

1 cup mayonnaise
½ cup canned whole berry cranberry sauce
½ medium jalapeno pepper, seeded and finely diced (about 1 tablespoon)
1 teaspoon cumin

8 whole wheat buns, toasted
Beefsteak tomatoes
Red onion

1. Place the lentils in a pot over medium heat. Cover with 4 cups of water. Simmer until the lentils are soft, about 30 minutes. Remove 1 cup of the cooked lentils to a large bowl. Mash the remaining lentils.
2. Heat the olive oil in a skillet over medium high heat. Cook the diced mushrooms until softened, about 5 minutes.
3. Place the mashed lentils and mushrooms into a large bowl.
4. Add the kidney beans, bread crumbs, onion, roasted garlic and Worcestershire to the bowl. Mix well.
5. Add the thyme and 1 cup whole lentils. Season with salt and pepper.
6. Use your hands to from the mixture into 8 large patties. Place each patty on a baking sheet and refrigerate for 2 hours.
7. Mix together the mayonnaise, cranberry sauce, jalapeno and cumin in a small bowl.
8. Cook the patties over a hot grill or in a grill pan for 5 minutes per side or until golden brown.
9. Serve on a toasted whole wheat bun with slices of ripe beefsteak tomatoes, red onion and a dollop of the mayonnaise.

Servings: 8
Preparation Time: 45 minutes plus refrigeration

Meatballs with Eggplant Topped in Muenster Cheese


Serves 6 to 8
Preparation time: 1 hour

1 tablespoon olive oil
2 medium shallots, minced (about 2 tablespoons)
1 medium eggplant, peeled and finely diced into 1/8-inch cubes (about 4 cups)
4 cloves garlic, minced (about 2 tablespoons)
Salt and freshly ground pepper
1 ½ pounds ground sirloin
2 cups Marinara sauce
8 ounces muenster cheese sliced

Preheat oven to 350 degrees. In a hot pan heat the olive oil over medium high heat. Cook the shallots until soft. Add the eggplant and garlic and cook for several minutes. Season with salt and freshly ground pepper.

Remove the pan from the heat and allow to cool.

In a large bowl combine the ground sirloin and the eggplant mixture. Form into 1-inch meatballs and place on a baking sheet. Bake from 10 to 20 minutes or until cooked through.

Pour ½ cup of the marinara sauce into a large baking dish. Place the meatballs in the dish. Pour the remaining sauce on top and place a slice of cheese on top of each meatball. Bake for 20 to 30 inutes until the cheese begins to melt.

Monday, August 15, 2011

How I rang in Artisan Cheese Month with Great Beer and 4 Sensational Appys


Apparently, wine and cheese are over. Don’t get me wrong—I still enjoy the fruity contrast of good vino with a savory hors d'oeuvre, but in these dog days of summer when I wandered into the cool of my local grocery store to pick up some odds and ends, a community cooking event had me toasting the merits of cheese and beer instead. What I learned that day made me rush home and try my favorite pilsner with something wonderfully (cheesy) I learned to make recently: Mini Welsh Rarebit with Roasted Pepper Chutney. The sharp white cheddar in the dish tamed the heat for a perfect marriage of spice and sweet—and washing it down with the scrubbing bubbles of a good beer made my cleansed palette appreciate it all the more.

Lately Whole Foods is the “Big Cheese” in Community Cooking!

Wanting to know more about pairing beers and nibbles, my attention got snagged Saturday when a large crowd gathered around the Whole Foods cafeteria; I noticed they were holding wine glasses full of something much more amber and carbonated than your average Cabernet Sauvignon. I got in for a closer look, saw a Fromager named Becca who worked as a cheese buyer for the store, and added my hands to the applause she was getting for sips, later revealed as India Pale Ale. At first glance it looked like a political event. The blue and white sign that identified the elegant scene said “Artisanal Cheese Month”—and under it two chefs dressed in buttoned down white bustled around a long table, one pouring beer and the other floating by with assorted cheeses.

Beer is the De Facto Complement for Cheese. Here are 3 More Appys that Pair Well with It!

The aforementioned subtitle makes sense when you consider that beer and cheese come from the same place. English farmers have known it all along, making the Ploughman’s Lunch extremely popular in the day, when the season was just right to enjoy beer made during winter months on the farm with cheeses cultivated that summer from the same barley. Beer and artisan cheeses, on anybody’s plate, feature many of the same floral and citrusy undertones that farmers have savored for centuries. While wine and cheese parings are all about contrast, beer and cheese pairings are about harmony. So…taking my cues from the traditional Ploughman’s Lunch of ham, some really good cheese and, naturally, beer I began experimenting with locally made cheese and microbrews created just as lovingly; I used white sharp cheddar to make my English Crabbies, Bacon Cheddar Bites and Cheddar Scones.

Attention Female Foodies: Beer Not Just a Man’s Drink

These pleasing appetizers underscore the fact that the grains used to produce beer are often the same fed to milk-animals for the cheese, and so I began to more fully appreciate the robustness and crispness of beer—how good it can be! It was extra gratifying—as a female foodie—to blast through that gender barrier that women can’t love a good beer the same way a man can. Beer isn’t just a man’s drink anymore—it’s for anyone who savors earthy, yeasty, musty, fruity, rich, toasty and floral flavors. I can assure you these foodies will be equally delighted in the way beer jibes with cheeses of the world.

For excellent beer and cheese pairing tips, click on this artisanal cheese site, and don’t miss out on events that are popping up in high-end grocery stores these days, many of them free to the public. Next week, I’m learning how to shop on a budget at Whole Foods, using what I learn to tackle my own more expensive recipes. Should be interesting! Tune in at the first of September to find out how it went!

Until then, Bottoms up. Enjoy what’s left of August, “Artisan Cheese Month”!

Cheddar Scones


2 cups self-rising flour
½ cup butter, chilled and diced (1 stick)
1/4 cup extra sharp cheddar cheese, grated
Zest of ½ medium orange (about 1 tablespoons)
1/3 cup buttermilk

1 large egg, beaten


Preheat oven to 400 degrees
1. Place the flour and the butter into the bowl of a food processor. Pulse until the mixture resembles course crumbs.
2. Add the cheese and orange zest and pulse just to combine.
3. Pour just enough of the buttermilk through the feed tube so that a dough forms around the blade.
4. Remove the dough to a floured board and knead lightly.
5. Roll out the dough. Use a biscuit cutter dipped in flour to cut out scones. (Or roll the dough into a thick circle and cut into triangular, pie-shaped pieces).
6. Place the scones on a Silpat lined baking sheet.
7. Brush the tops with beaten egg.
8. Bake for 12 to 15 minutes depending on size. The scones should be golden brown on the top.
9. Cool on a wire rack.

Yield 10 to 12 scones
Preparation Time: 10 minutes plus baking

Mini Welsh Rarebit with Roasted Pepper Chutney


Yields: 12 appys
Prep Time: 30 minutes


Cook Time: 30 minutes for chutney, 4 to 6 minutes for appys

4 large red bell peppers
2 orange Anaheim peppers (or 4 medium jalapeno peppers)
1 tablespoon olive oil
1 large red onion, thinly sliced, about 1 cup
1 teaspoon coarse salt
½ teaspoon coarsely ground pepper
½ cup brown sugar
1 cinnamon stick
3 fresh bay leaves
1 tablespoon grainy mustard
¼ teaspoon paprika
1 cup homemade chicken broth, or prepared low sodium chicken broth
2 ounces sharp white cheddar cheese, grated, about ½ cup
½ cup sour cream
12 slices whole grain bread (party bread size)
¼ cup mayonnaise

Prepare the chutney by roasting the peppers. Heat an outdoor grill or grill pan on high heat.


Place the whole peppers onto the grill. Char the skin on all sides until black and blistered. This will take about 20 minutes for the large peppers, less for the smaller ones. Transfer the peppers to a bowl, cover and steam for 15 minutes. Pull off the charred skin. Remove the stem and core. Use a knife to scrape away the seeds, heeding the cautionary advice below. Chop the peppers. CAUTION: If you are sensitive to hot peppers, wear gloves for this task. Remember to wash your hands and work surface after working with the seeds and do not touch your eyes.


While you are roasting the peppers, you can prepare the onions. Heat the olive oil in a skillet over medium heat. Add the onions and cook until softened, about 15 minutes. Add the chopped peppers, brown sugar, cinnamon stick, bay leaves, mustard, paprika and chicken stock. Simmer until the chutney becomes thick and syrupy, about 30 minutes. Remove the cinnamon stick and bay leaves and season with salt and pepper if necessary.


Preheat the oven on the broil setting. Stir the cheese, sour cream and mayonnaise together in a bowl. Layout the bread slices on a baking sheet coated with vegetable oil spray. Spread a thin layer of chutney onto each slice. Spread a heaping spoon full of cheese topping over the chutney. Broil until the topping is browned and bubbling, about 4 to 6 minutes.

Bacon Cheddar Bites


½ pound bacon, cooked, drained and crumbled
2 cups grated sharp cheddar cheese
15 pitted black olives
1 tablespoon fresh parsley
½ medium onion
2 tablespoons prepared mustard
3 tablespoons mayonnaise
½ cup butter (1 stick), room temperature
1 loaf party rye rounds

In the bowl of a food processor place the cooked bacon, cheese, olives, parsley, onion, ustard and mayo. Pulse to combine.

Lightly butter both sides of each bread slice.

Spread a spoonful of the bacon cheese mixture on top of each slice of bread. Freeze for at least 15 minutes.

Place the Cheddar bites between sheets of plastic wrap in an airtight container and freeze until needed.

Place the bites on a baking sheet. Bake at 350 degrees for about 10 minutes or until brown and bubbling.

English Crabbies


1 (7-ounce) jar processed cheddar cheese spread
½ cup butter
¼ cup mayonnaise, room temperature
12 ounces imitation crab
½ teaspoon salt
½ teaspoon garlic powder
1 loaf party pumpernickel bread

In the bowl of a food processor place the cheese spread, butter, mayonnaise, chopped crab, salt and garlic powder. Pulse to combine.

Spread a spoonful of the crab mixture onto each pumpernickel slice. Place each one on a baking sheet freeze for at least 15 minutes.

Place the crabbies between sheets of plastic wrap in an airtight container and freeze until needed.

Place the crabbies on a baking sheet. Bake at 350 degrees for about 10 minutes or until brown and bubbling.

Friday, July 29, 2011

A Veggie Lasagna Grown From My Own Lauderdale Roots

Food prices are climbing higher than flowers on a trellis. During a recent tour of a local hydroponic farm, the tour guide said that inflation on groceries had risen 30% already, and that learning to grow your own fruit and veggies might not be such a bad idea. The best part about the tour and learning more on CSA (Community Supported Agriculture) was how easy they made it all look; “they” being The Urban Farmer in Pompano, FL—that’s in the Lauderdale area where I’ve lived for decades.

John, the guide that day seemed optimistic and sincere when he told everyone that growing the okra, swiss chard, yellow squash and eggplant—not to mention multitude of other leafiness we saw around us—was something any of us could do. We all tried samples of what he clipped from the plants, pleasantly taken aback by how fragrant and bold the flavors were. Nothing was tainted by pesticides; it was all 100% pure, and if we didn’t want to attend CSA workshops on how to grow it ourselves, we were encouraged to sign up for CSA Membership with Jessica Padron, the owner.

Is There An “Urban Farmer” in All of Us?

It was so gratifying to see Jessica swamped with customers and potential customers on the sweltering July afternoon the tour took place. The Urban Farmer lets you sign up for a weekly or biweekly box of fresh and local veggies, starting at a very reasonable price of $128 a month; you can also arrange to buy grass fed beef, fresh eggs and local honey—just about anything and everything that makes dinner for your family a healthier affair. That day, visitors to The Urban Farmer took home a few odds and ends plucked right off the vine in front of them; many of them had the makings for veggie lasagna—all they needed now were pasta strips, ricotta and rest of the ingredients to whip up a savory Tomato and Sautéed Veggie Sauce I use in this dish.

This Veggie Lasagna Pays Homage to the Slow Food Movement

One of the things The Urban Farmer said about what they’re doing really resonated. I’ve experienced (and tasted!) it before when I had a share at Green Cay Farms in Boynton and enjoyed their weekly box of in season produce: it’s all about the Slow Food Movement. So I offer you my recipe for Veggie Lasagna -- homage to the Slow Food Movement, which started in Italy because foodies there, who loved the Spanish Steps in Rome, were protesting McDonald’s, a fast food restaurant on schedule (not anymore!) to be built there. That was in 1986, and ever since, this movement—as young as it is fresh and tasty—has been asking communities to take a moment and appreciate high quality and locally grown foods that make their region unique. The Ark of Taste was born, and if you click the link you can read about everything from Italians trying to preserve delectables like Italian honey and exotic sounding fruits, to meat lovers in the USA who cherish their Florida cracker cattle, America Plains Bison and New Hampshire chicken.

Dance to the Slow Food Movement tonight by making a dish that calls for some locally grown items…actually, your marina sauce won’t hate you if you use out-of-state tomatoes, but your taste buds will love you if you harvest from your own zip code…and so will the local economy. I can’t think of a better way to stop thinking about the debt ceiling, can you?

Tomato and Sautéed Vegetable Sauce


2 tablespoons olive oil
1 large onion, chopped (about 2 cups)
1 large zucchini, chopped (about 2 cups)
2 large squash, chopped (about 2 cups)
1 small eggplant, chopped (about 3 cups)
4 cloves garlic, minced (about 2 tablespoons)
1 pound button mushrooms, sliced (about 3 cups)
2 28-ounce cans chopped tomatoes
2 tablespoons tomato paste
2 tablespoons chopped basil
1 tablespoon chopped oregano
1 tablespoon sugar
Salt and freshly ground pepper

In the bottom of a large pot heat olive oil over medium high heat.

Cook the onions in the pot for several minutes. Add the zucchini and squash and cook until the vegetables begin to soften. Add the eggplant and cook until it begins to soften.

Add the garlic and mushrooms and cook for 5 minutes more. Add the chopped tomatoes, tomato paste, basil, oregano, and sugar. Simmer for 15 minutes. Season with salt and pepper.

Serves a crowd; prep time: about 30 minutes.

Vegetable Lasagna


1 32-ounce container ricotta cheese
1 10-ounce package frozen chopped spinach, cooked and squeezed dry
½ cup grated parmesan cheese
2 eggs
12 ounces shitake mushrooms, sliced in half
1 tablespoon butter
1 tablespoon fresh rosemary
1 16-ounce package lasagna noodles
1 pound fontina cheese, grated
¾ cup grated Parmesan cheese

Prepare the tomato and Sautéed Vegetable Sauce. In a bowl mix together the ricotta cheese, drained spinach, Parmesan cheese, and eggs and set aside.

Sautee the mushrooms in the butter until cooked. Sprinkle with rosemary and set aside. Cook the lasagna noodles according to package instructions. Drain well and place them on a baking sheet coated with vegetable oil spray.

Place ½ cup of the Tomato and Sautéed Vegetable Sauce in the bottom of a lasagna pan or deep baking pan.

Place a layer of lasagna noodles in the bottom of the pan.

Top the noodles with sauce, one third of the ricotta cheese mixture, and one fourth of the Fontina cheese. Sprinkle with grated parmesan cheese. Repeat with a layer of noodles, sauce, ricotta cheese and Fontina cheese. Add the sautéed mushrooms and sprinkle with Parmesan cheese.

Layer again with noodles, sauce, the remaining ricotta cheese and Fontina cheese.

The final layer is noodles, tomato sauce, and the remaining Fontina and Paremsan cheese.

Preheat oven to 350 and cook the lasagna 30 minutes covered with aluminum foil. Uncover and continue cooking until it begins to bubble and the cheese is melted on the top, about 20 minutes or more. Let stand at least 15 minutes before serving.

Serves a crowd.
Preparation time: about 1 hour plus baking

Friday, July 15, 2011

A Summer Tiki Party


Where the Birds Sing and the Flowers Bloom


Welcome to a tropical hideaway, you lucky people, you…or so the Enchanted Tiki Room song went, when it was written for Disney World in 1963. In Mad Men, (if you’ve never heard of the AMC television series, come out of your cave) Don Draper would definitely approve of the ambience found in a tiki room; a party with the kind of atmosphere where “Skirts” and fedoras drift by, the booze flows freely and kool kats enjoy a little intoxicating food and drink, their smokes, and music that gives Elvis’ Blue Hawaii a run for its money. To recreate such a scene, I’m recreating the Polynesian PuPu Platter and serving up my Hurricane Brew in hollow coconut shells—what a way to cool off this summer!


Tiki Time Event Menu


Purveyors of tiki culture were the proprietors of Don the Beachcomber restaurant and Trader Vic’s; both were, in the 1930s, young men who had sailed throughout the South Pacific and loved exotic rum punches, rattan furinture, tropical flowers and tiki torches—it was a way of dining and entertaining that peaked in the 50s and 60s, vanished in the 70s and has come back for an encore now. In homage, her’es my PuPu platter, defined as a tray of Chinese American/Hawaiian assorted small meats and seafood appetizers: think egg rolls, chicken wings, savory skewers and other temptables for kool kats.


Get out your best monkeywood platter and load it up with all or some of the following:


Grilled Rum Marinated Flank Steak Sandwiches with Chipotle Lime Aioli
Barbecued Pork Tenderloin Skewers with Cranberry, Corn and Avocado Relish
Buffalo chicken lettuce wraps
Mustard Coated Chicken Skewers with Grilled Veggie Salsa
Fried Calamari with Tuna Caper Dipping Sauce
Tropical Trifle for Dessert
Signature Drink:
Hurricane Brew

I can’t say enough about these tiki-rific choices. Make sure you have a jar of Maraschino cherries standing by to garnish the plate in true PuPu platter style. For the flank steak sandwiches, your everyday sammy gets a makeover with a big burst of flavor, and the chicken skewers offer an update on fast food chicken fingers that’s easy to prepare. Fried is a distinguishing factor to any PuPu platter, which is why I added the calamari, but with a dipping sauce that cuts through that salty, deep fried heaviness.

As Seen on Mad Men…Drink It, Wear it or Use it at Your Tiki Party!
And now to introduce my signature drink for the big event. My Hurricane Brew is best whipped up in a pitcher, then authenticated by pouring the concoction into hollowed pineapples. You’ll need a few tools to serve the Brews this way; first a pineapple slicer, which removes the core and gives you a neat stack of pineapple rings—and drinking glass!!—in seconds. This is a cocktail that will have you looking all over for those little paper umbrellas; it calls for rum both light and dark, grenadine, fresh citrus juices and plenty of granulated sugar. If you don’t want to trouble yourself with real pineapple glasses, check out the Tiki drinking glasses I found shopping online; you’ve probably seen this same set with lipstick stains on the rim in Mad Men. Oh, and speaking (again!) of that series, did you know Banana Republic is coming out with its own Mad Men clothing line in August 2011? That’s this summer! View the whole Retro clothes collection by clicking the link.

Here’s a hyperlink shortlist of other tiki bar supplies I found for cheap…real cheap…on Amazon:

Paper Cocktail Parasols - Pack of 144
Pineapple slicer
tiki luau drinking straws

And while you may love behaving like "Mad Men" at your tiki party this summer, don’t expect to see the show again until 2012…how many great parties will you have before then!

Happy Mai Tai Sipping, Everyone!
Related Posts with Thumbnails